There are few things more exciting than upgrading your vape experience with a bright and shiny new device, complete with a tank and coils that make the perfect pairing.
The first vape session with a new device is like a little slice of vape paradise, as you learn your way around all the new features you now have at your fingertips.
However, if you aren’t well-versed in the process of cleaning and maintaining your beloved vape, the honeymoon phase is bound to end.
You’ll be stuck with a gunky, messy device that doesn’t quite measure up to its initial level of performance, and you might just be tempted to cut your losses and spring for a new one – but don’t give up on your vape just yet.
Here are VaporFi, one of the most common vaping questions we hear from customers has everything to do with how to clean a vape to maximize both the vape experience and the lifespan of the device.
Learning how to clean atomizer coils and tanks is a mainly unknown topic for those that are new to vaping, and even advanced vapers find that it’s helpful to brush up their knowledge every once in a while.
We’re breaking down everything you need to know about how to clean e-cig, vape pen, and mod tanks and coils, giving you a handy at-a-glance guide that will keep your device in tip-top vape shape.
Basic Anatomy of a Vape
Before you can jump into cleaning atomizer coils, tanks, and other pieces of your vape, it’s key that you have a basic understanding of the device’s anatomy. Of course, there may be some slight variations depending on your specific set-up, but you can generally count on a vape including these three primary elements in some form:
Vape Battery
The vaporizer’s battery serves as the source of power and may offer customizable options such as variable wattage and temperature control.
Smaller devices like vape pens and e-cigs may use removable batteries while larger mods feature built-in styles.
Vape Coils
The coil acts as a heat source, raising the temperature of your e-juice to convert it into the delicious, fluffy vapor you know and love. The number, type, and specific construction of coils vary depending on your device.
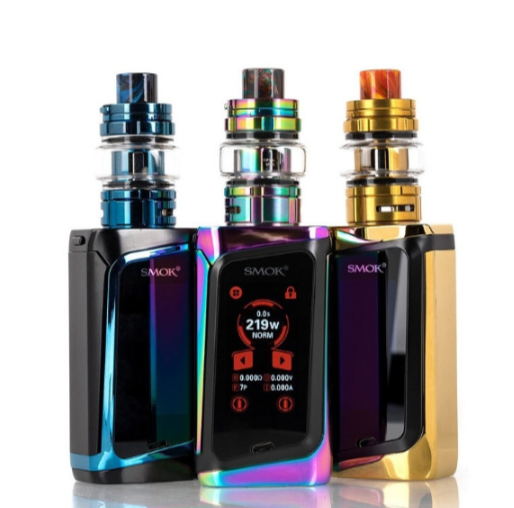
For example, if you’re the proud owner of a SMOK mod, the odds are that you’ll be cleaning SMOK coils more often than not – it’s usually recommended that you choose coils from the same manufacturer that built your device, simply for the sake of easy compatibility.
Vape Tank
The vape’s tank is responsible for storing the e-juice and can either be built-in or removable. Advanced mods offer a wider range of options when it comes to choosing a vape tank, which can be a significant benefit for vapers who want to personalize their vape experience to fit their specific preferences.
Vape Mouthpiece
As you’d probably guess, the mouthpiece is where you place your mouth to receive the smooth vapor once your device is powered on.
Vape Display screen and buttons
Your vape might also feature buttons or a display screen, particularly if you select an advanced mod. However, simpler vape set-ups may be button-free, instead of relying on the draw-activated operation.

Buy SMOK Nord Vape Pod Starter Kit
How Often to Clean a Vape Device
Knowing when to clean your vape device is somewhat similar to figuring out when your home needs a good once-over.
Much like your home, your vape doesn’t necessarily need a deep clean every single day, but it’s a good idea to do some basic tidying up regularly.
Being familiar with how to clean vaporizers is all well and good, but it’s useless information if you never actually put it into practice.
Getting into a routine is often the best way to make sure you’re taking care of your vape as you should.
There are a few can’t-miss cleanings that you’ll want to make a regular habit, especially if maintaining peak performance sounds like something you’re interested in.

Every time you change e-liquid flavors
Each time you swap our your e-juice flavors, be sure to rinse out and clean your vape tank. This will ensure that none of the old e-liquid affects the flavor of the new one.
On a weekly basis
Every week, do a quick once-over to take care of any obvious issues, like leftover e-juice drips or build-up on the mouthpiece.
Every few weeks
Plan to do a good deep cleaning every two to three weeks, depending on how frequently you vape.
One way to remind yourself to tackle this task is to set a recurring alarm on your phone, so you won’t have to worry about remembering when you last cleaned your vape.
Anytime you notice a dip in performance
Does your vape seem to be acting up? Or maybe it’s just not measuring up to its usual standard of performance – whatever the case, many vape issues can be solved with a good cleaning.
How to Clean a Vape Tank
The condition of your vape tank is one of the factors that can dramatically impact the quality of your vape experience, especially when it comes to flavor.
While taking the time to clean vape tanks between e-juice flavors might seem like a hassle, we can promise that it’s more than worth the effort.
After all, there’s nothing that takes the enjoyment out of a fresh new flavor like realizing that you can still taste remnants of the old flavor.
We’re willing to bet that a few minutes is a fair trade for avoiding an unintended and unpleasant flavor mix, especially a tongue-tingling combination such as espresso and sour apple.
Keeping your vape flavors deliciously pure is as easy as sticking to a good vape tank cleaning routine.
Usually, a quick and easy rinse will do the trick, but a deeper clean using alcohol is sometimes necessary as well.
Rinsing your tank between flavors
When it comes time to make a flavor swap, follow these simple steps for a fast, fuss-free rinse:
1. Fill a clean bowl with warm water.
2. Remove the vape tank from your device.
3. Dump any last traces of e-juice left in the tank.
4. Carefully take apart your tank, paying attention so that you’re prepared to put it back together later.
5. Gently place all parts of the tank into the bowl of water.
6. Wash each component, swishing it through the water for a good rinse. If you notice excessive residue on your tank, you can also add a few drops of dish soap to the water.
7. Use a paper towel or lint-free cloth to dry the tank components.
8. Allow all parts to air dry for at least 10 to 15 minutes.
9. Reassemble the tank and reattach it to your device.
Cleaning a vape tank with alcohol
Using alcohol to clean a vape tank is an effective way to remove remaining residue and make it shine like new. Here’s the process for using alcohol to clean a vape tank:
1. Remove the vape tank from your device.
2. Dispose of any remaining e-juice in the tank.
3. Take apart the tank so that all components are separated.
4. Using high-proof, unflavored vodka or everclear, dampen a lint-free cloth or paper towel. (Do Not Use Rubbing Alcohol!)
5. Scrub all components of the tank with the dampened cloth, rewetting it as needed to tackle tougher build-up or stains.
6. Wipe and use warm water to rinse all the parts.
7. Dry using a paper towel or lint-free cloth, then allow to air dry for 10 to 15 minutes.
8. Put your tank back together and reattach it to your device.
How to Clean a Vape Coil
Keeping vape coils clean is critical, but it’s also important to know what you should expect to replace coils regularly.
Usually, coils need to be replaced every few weeks. Depending on the coil set-up you’re working with, cleaning vape coils may or may not be something worth trying at home.
Cleaning replaceable coils
If you’re using replaceable coil heads, it’s technically possible to clean them – but you shouldn’t count on the process to make used coils like new.
If anything, you might be able to extend the coil lifespan a couple of days with cleaning, just enough time to order new coils.
Keep in mind that cleaning vape coils mean that you’ll be left with soaked wicks, which you’ll have to let dry for quite some time. If you’re still interested in giving it a try, a simple combination of soaking and rinsing might help:
1. Soak the coil in vinegar, or ethanol for a couple of hours.
2. Rinse the coil using tap water, then do a second rinse using distilled water.
3. Gently blow on the open side of the coil to force as much water as possible to the wicking holes.
4. Let air dry until all water has evaporated and the wick is completely dry.
Cleaning rebuildable coils
Working with a rebuildable atomizer is an entirely different matter – you can and should be regularly cleaning rebuildable coils.
Sometimes, a “dry burn” can help clear off e-juice residue. Remove the wicks, pulse the fire button a few times until the leftover e-juice is gone, then let it cool before re-wicking.
If that doesn’t work, it might be time for a full coil cleaning. Here’s a rundown of how to clean RBA coils:
1. Remove the wicks from the coils.
2. Lightly dry burn the coils, but don’t let them glow for too long.
3. Take apart your device to remove the atomizer element from the mod.
4. Place the atomizer under running water, using a toothbrush or coil cleaning tool to brush and clean it gently. If necessary, you can use a small amount of dish soap, as long as you rinse thoroughly afterward.
5. Rinse with water.
6. Dry burn the coils a final time to get rid of any remaining water.

Buy SMOK Morph Vape Pod Starter Kit
Shop the Best Tanks and Coils for Sale from VaporFi
Now that you’re well-prepared to maintain a clean vape tank going forward, why not start yourself off on the right foot with a new vape tank and coils?
Whether you’re new to vaping or have some serious vape hours under your belt, the fast and furious pace of vape innovation means there’s always something exciting hitting the market.
VaporFi stocks our virtual shelves with an extensive selection of newly-released vape coils and tanks, as well as all the must-have favorites – you can count on finding the perfect vape set-up to suit your needs.
Explore an exceptional line-up of top-selling vape tanks and coils from VaporFi to discover your newest must-have vape accessories today.
Image Credit: Shutterstock/Alejandro Hernandez Lopez


